Introduction
In IIS 6.0, administrators had a safety net that allowed them to
easily ascertain what changed in the IIS configuration. It was
implemented as a history file that could be restored easily, and served
as a usable history of events that happened to the configuration. In
case anything went wrong during application installs, upgrades, or
individual changes to the metabase, the user could restore to a working
state.
With IIS 7.0 and above, the IIS team wanted the same "safety net,"
yet we could not use the IIS 6.0 history feature because of changes in
the configuration architecture. In IIS 7.0 and above, we resolved this
problem by creating a service that monitors for changes to the master
configuration file, ApplicationHost.config, and periodically creates
snapshots to later retrieve if necessary.
This feature is called IIS Configuration History. This walkthrough illustrates how this feature works.
Tasks in This Walkthrough
Task 1: Reviewing configHistory Default Configuration Settings
In this task, you review the configuration options available after a
default IIS installation. In later tasks, you later modify some of these
settings to show the flexibility of the feature to fit the environment.
Step 1: Open applicationHost.config
- Click Start, click Run, and in the Open: dialog box, type notepad and Click OK.

Figure 1: Opening Configuration with Notepad
- Click File, then Open, and in the File name: dialog box, type %windir%\system32\inetsrv\config\applicationHost.config. Click Open.
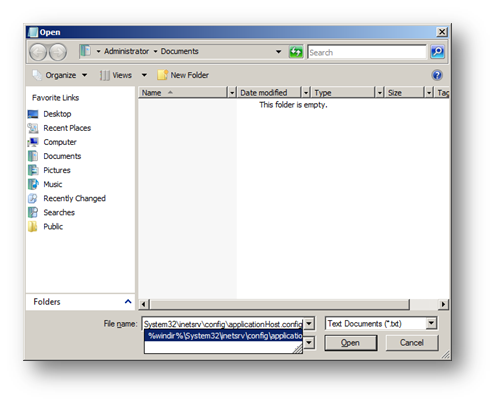
Figure 2: ApplicationHost.config Path
- To locate configHistory section, click CTRL-F and enter configHistory and Click Find Next.
After opening the master file, you see an entry like the following for configHistory:
 name"system.applicationHost>
     name="applictionPools" allowDefinition="AppHostOnly" overrideMode="Deny" />
     name="configHistory" allowDefinition="AppHostOnly" overrideModeDefault="Deny" />
        name="customMetadata" allowDefinition="AppHostOnly" overrideModeDefault="Deny" />
        name="listenerAdapters" allowDefinition="AppHostOnly" overrideModeDefault="Deny" />
        name="log" allowDefinition="AppHostOnly" overrideModeDefault="Deny" />
        name="sites" allowDefinition="AppHostOnly" overrideModeDefault="Deny" />
        name="webLimits" allowDefinition="AppHostOnly" overrideModeDefault="Deny" />
Notice that there are no further settings for this feature in
applicationHost.config. This is expected behavior because by default,
IIS uses the values stored in the IIS schema. To see the default
settings, open the IIS schema file (IIS_schema.xml.)
Step 2: Locate configHistory Defaults in IIS Schema
- Click Start, click Run, and in the Open: dialog box, type notepad and Click OK.
- Click File, then Open, and in the File name: dialog box, type %windir%\system32\inetsrv\config\schema\iis_schema.xml.
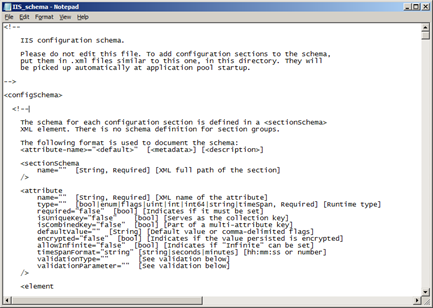
Figure 3: IIS Schema
- To locate configHistory section, click CTRL-F and enter configHistory.
- On Windows Server® 2008, you see the following:
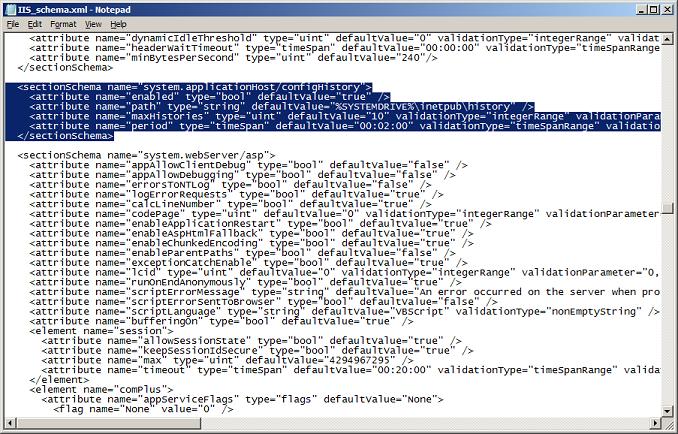
Figure 4: configHistory Schema Definition
There are four configurable settings (attributes) for the configHistory section:
| Attribute |
Default Setting |
Definition |
|
enabled |
True |
This value indicates whether configuration history is enabled or disabled |
|
path |
%systemdrive%\inetpub\history |
The path where history directories are created and stored |
|
maxHistories |
10 |
The maximum number of directories retained |
|
period |
00:02:00 |
The time between each check made for changes |
Summary
Despite its relative simplicity, do not overlook this task. It offers
direct insight into configuration attributes available for the
configHistory section. You later modify these settings as a
demonstration of the features flexibility based on the environment.
Task 2: Validating configHistory Functionality is Working Properly
The goal of this task is to see configHistory in action. Furthermore,
for experienced administrators who understand the IIS 6.0 metabase
history, this task aids in learning the differences between the two
features.
Metabase history was a file-based, rather than directory-based, like
the IIS 7.0 and above configuration history. For example, all backups in
IIS 6.0 were stored in the same location that was not customizable. In
IIS 7.0 and above, each unique copy is stored in its own directory at
creation time. In this task, you make some changes to the IIS
configuration file using IIS Manager and review the results of these
changes.
Step 1: Create a Website
- Click Start, Run, and type Inetmgr and Click OK.
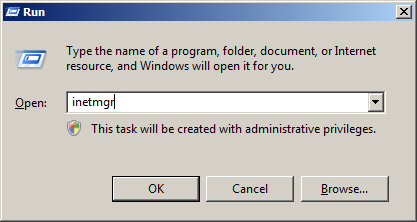
Figure 5: Opening IIS Manager
- Double-click your server name, for example IIs7Server, to expand the navigation tree.
-
Right-click the server, and choose Add Web Site.

Figure 6: Add Web Site
-
In the Add Web Site wizard, enter information to create a new Website. For example:
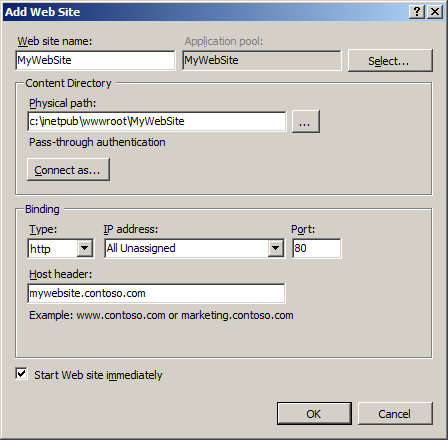
Figure 7: Add Web Site Wizard
- Click OK.
- You now see the new Website created in your IIS Manager, as in the following:
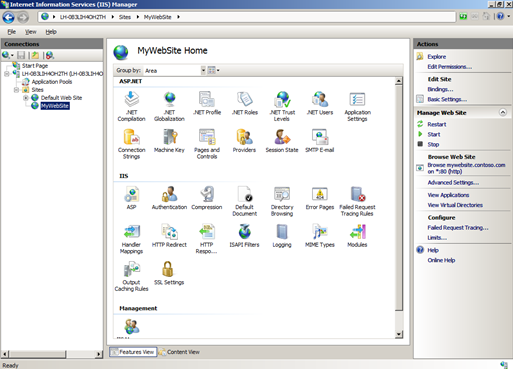
Figure 8: IIS Manager Homepage
Now, we validate that a successful backup of the configuration
changes has been captured by the Application Host Helper Service.
Step 2: Locate History Files for applicationHost.config
Note: It is likely that your
copy will not show immediately after following these steps. This is
based on the default value of two minutes. If you find that no copy is
created, check to make sure that you have waited two minutes.
- Click Start, Run, and open %systemdrive%\inetpub\history.
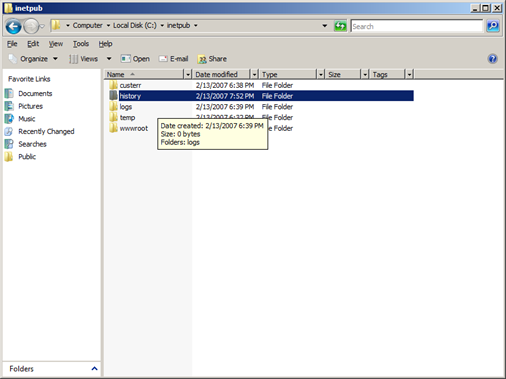
Figure 9: Configuration History Default Path
- Double-click the history folder and locate the most recent change.
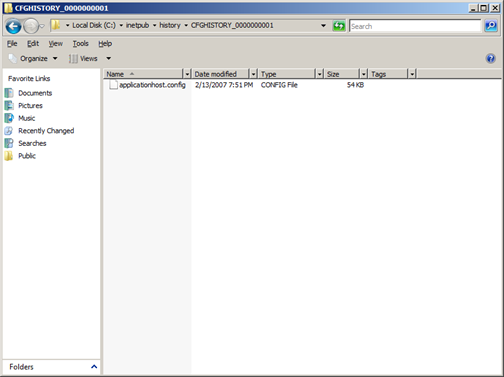
Figure 10: History File of ApplicationHost.config
Note: If you fail to locate
your copy in the history folder, verify that the Application Host Helper
Service is running. Check your Event Viewer for any potential errors
thrown by IIS-AppHstSvc.
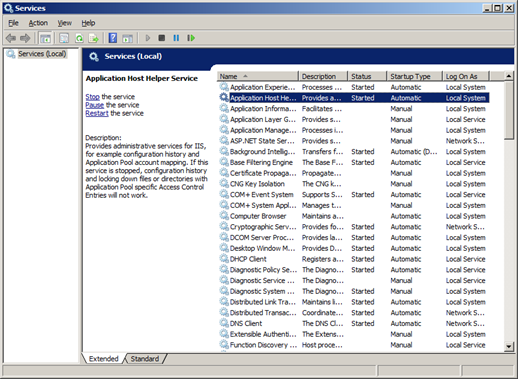 Figure 11: Application Host Helper Service
Summary
In this task, we took a few steps toward understanding how the IIS
configuration history feature works. First, we made changes to
ApplicationHost.config, triggering the Application Host Helper Service
to create a copy at the next scheduled period. Further, we located the
copy and validated that we successfully created the copy in
%systemdrive%\inetpub\history.
Task 3: Modifying the Number of Directories (maxHistories) Retained and the Period Attributes
The goal of this task is to successfully modify the number of history
files retained by IIS 7.0 and above. Because the defaults are stored in
the schema, we must create the configHistory section in
applicationHost.config and add the appropriate attributes and values for
the maxHistories and period attributes.
In this task, use Notepad to modify this attribute to show the flexibility and simplicity of editing ApplicationHost.config.
Step 1: Open applicationHost.config
- Click Start, click Run, and in the Open: dialog box, type notepad and Click OK.
- Click File, then Open, and in the File name: dialog box, type %windir%\system32\inetsrv\config\applicationHost.config and Click Open.
The next step is to add the configuration section, and then add the attribute with value.
Step 2: Add configHistory Section and Add maxHistory
- To locate configHistory section, click CTRL-F and enter
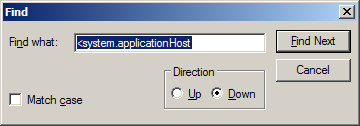
Figure 12: Locating system.applicationHost Section Group
- Now that you are in the right section, add the correct attribute and
value for maxHistory. Type the following text into your
system.applicationHost section group:
maxHistories="15" />
Note: To save time in your next step, leave notepad open after completing this task.
Last, validate that the change has taken place. We know that by
default that we should only see 10 directories at a time as defined by
the IIS schema.
After we increase the maximum values kept by IIS, we need an easy
method to trigger many directories to be created. To simulate this, we
lower the default value for the period attribute to its default minimum
of 10 seconds. This increases the interval for checking for changes and
hence potentially creates more copies of the files in a dynamic
environment.
Step 3: Set Period Attribute for configHistory
- Using the previous session, add the period attribute by adding the period="00:00:10".
- Click File, Save to commit changes.
After completing, the configHistory section looks like the following:
maxHistories="15" period="00:00:10" />
Step 4: Execute Script to Cause History Creation
- Open Notepad. Copy and paste the following:
Option Explicit

' Global objects, variables
Dim objShell, argObj, oExec
Dim strDirectory, strFile, strCmd, strFullCmd, stdIn, i

set objShell = CreateObject("Wscript.Shell")
strDirectory = "%windir%\system32\inetsrv\"
strFile = "AppCmd.exe"

set ArgObj = Wscript.Arguments

' No args (default case), hard-code StdIn
If ArgObj.Count = 0 Then
stdIn = 17

i = 0 'initilize i

For i = 0 to stdIn
' Call Select Case to change Statement
strCmd = getStrCmd(i)
strFullCmd = strDirectory & strFile & " " & strCmd

Set oExec = objShell.Exec(strFullCmd)

Do While oExec.Status = 0
WScript.Sleep 100
Loop

If oExec.ExitCode <> 0 Then
' Something wrong with the IIS Installation

' Is AppCmd installed on the machine? \inetsrv directory?
msgBox "Executing AppCmd Command Failed. Please Try Again!"

wscript.Quit
End if

WScript.Sleep(2 * 1000)

Next

' Handle the case where we passed arguments to
' the script

Else
stdIn = ArgObj(0)

' Same code as above but handle arguments being passed.

i = 0 ' initialize i

For i = 0 to stdIn
' Call Select Case to change Statement
strCmd = getStrCmd(i)
strFullCmd = strDirectory & strFile & " " & strCmd

Set oExec = objShell.Exec(strFullCmd)

Do While oExec.Status = 0
WScript.Sleep 100
Loop

' Validate that AppCmd calls succeeded by checking Error code
If oExec.ExitCode <> 0 Then
' Something wrong with the IIS Installation
' Is AppCmd installed on the machine? \inetsrv directory?
msgBox "Executing AppCmd Command Failed. Please Try Again!"
wscript.Quit
End if

' Go to sleep for x period (default: 20)
WScript.Sleep(20 * 1000)

Next

' End the StdIn Input Tree

End if

' AppCMD Command Function
Function getStrCmd(MyIndex)
Select Case (MyIndex)
Case 0 ' set Server Runtime
getStrCmd = "set config /section:serverRuntime /enabled:false"
Case 1 ' set Default Document
getStrCmd = "set config /section:defaultDocument /enabled:true"
Case 2 'set httpRedirect
getStrCmd = "set config /section:httpRedirect /enabled:true"
Case 3 ' set Client Certificate Mapping Auth
getStrCmd = "set config /section:security/authentication/clientCertificateMappingAuthentication /enabled:true"
Case 4 ' set Directory Browse
getStrCmd = "set config /section:directoryBrowse /enabled:true"
Case 5 ' set httpRedirect
getStrCmd = "set config /section:httpRedirect /enabled:false"
Case 6 ' set anonymousAuth
getStrCmd = "set config /section:security/authentication/anonymousAuthentication /enabled:false"
Case 7 ' set basicAuth
getStrCmd = "set config /section:security/authentication/basicAuthentication /enabled:true"
Case 8 ' set digestAuth
getStrCmd = "set config /section:security/authentication/digestAuthentication /enabled:true"
Case 9 ' set client cert mapping auth
getStrCmd = "set config /section:security/authentication/clientCertificateMappingAuthentication /enabled:false"
Case 10 ' set windows auth
getStrCmd = "set config /section:security/authentication/windowsAuthentication /enabled:true"
Case 11 ' server runtime
getStrCmd = "set config /section:serverRuntime /enabled:true"
Case 12 ' set Server Runtime
getStrCmd = "set config /section:serverRuntime /enabled:false"
Case 13 ' set Server Runtime
getStrCmd = "set config /section:serverRuntime /enabled:true"
Case 14 ' set Server Runtime
getStrCmd = "set config /section:serverRuntime /enabled:true"
Case 15 ' set Server Runtime
getStrCmd = "set config /section:serverRuntime /enabled:true"
Case 16 ' set Server Runtime
getStrCmd = "set config /section:serverRuntime /enabled:true"
Case 17 ' set Server Runtime
getStrCmd = "set config /section:serverRuntime /enabled:true"

End select
End Function
- Save this as ConfigHst.vbs (ensure that you choose All Files to avoid saving as a text file).
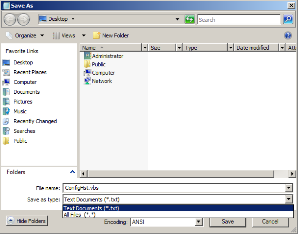
Figure 13: Saving VBS Script
- Run this VBS file by opening a command prompt, locating the file location where saved, and type the following:
cscript //nologo configHst.vbs
This script makes calls to modify the configuration of IIS every 15
seconds. This is enough time for the configuration history to check for
changes and create a backup. After completing this, we see a multitude
of configuration backups in our backup directory.
- Next, open the default path for the configHistory by clicking Start, then Run, and typing %systemdrive%\inetpub\history
- You see a backup folder such as CFGHISTORY_0000001, CFGHISTORY_0000002, and so on.
After running this script, notice how this feature pushes the oldest
out when hitting the maximum (i.e. maxHistories.) In our case, after
reaching CFGHISTORY_0000000015, the oldest item was deleted before
creating the sixteenth directory.
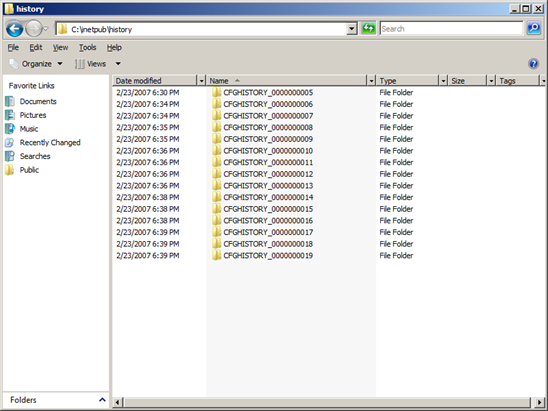 Figure 14: History Directory with maxistories value of 15
Summary
In this task, we successfully modified the number of backups stored
by IIS. The default setting of 10 is sufficient for many; yet, for
dynamic environments such as shared hosting servers where customers are
signing up for sites randomly and often, it is good practice to have a
more thorough history.
In this task, we modified the maxHistories and period attributes for
configHistory section and then produced multiple changes that would show
that we stored more than 10 (the default) copies.
Task 4: Changing the Default Path for Saving configHistory Backups
The number of history directories and associated files stored by IIS
is configurable to be flexible depending on the environment. For many
cases, storing the history files on the system path (i.e.
%systemdrive%inetpub\history) is not desirable. Unlike history in IIS
6.0, which had no configurable mechanism for configuration history, the
IIS 7.0 and above configuration history now offers the ability to change
where IIS stores the history directories and files.
We use in this task a method to modify the configuration--in this
case, the IIS command-line interface. The goal of this task is not only
to learn about changing the path for configuration history directories,
but also to become familiar with AppCmd.exe, the IIS command-line
interface to configuration and runtime data.
Step 1: Create Directory for History
- Click Start, select Run, and then type CMD and Click OK.
- At the command prompt, create your directory by typing the following:
md MyWebHistory
This step is required because no directory is automatically created
if it does not exist. If you fail to do this step, you see the
following:
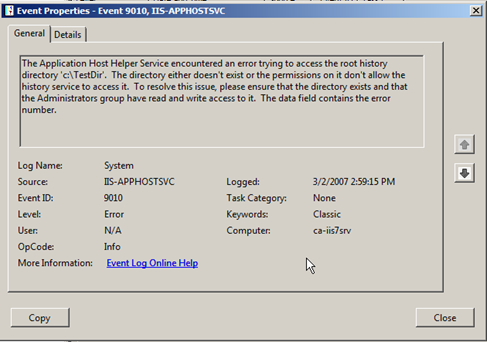 Figure 15: Event Message if Permissions Inadequate to History Path
Step 2: Locate AppCmd.exe
- Click Start, select Run, and then type CMD and Click OK.
- At the command prompt, change directories by typing the following:
Cd %windir%\system32\inetsrv
- To familiarize yourself with AppCmd's syntax, type the following:
Appcmd /?
At this point, change the value for the path attribute to a value
that is more appropriate in your environment. In this case, change it to
a custom directory on the system partition – the
%systemdrive%\MyWebHistory directory.
Note: Often you must move this data to a separate
partition, or better, to a drive on a different controller, such as D:\,
etc. Change the path value using AppCmd: -
Step 3: Change Path Value for configHistory
- To familiarize yourself further with AppCmd.exe, open a command prompt and type the following:
Appcmd set config –section:?
This command helps you learn how to review the currently available sections allowed for editing.
Appcmd list config –section:configHistory –config:*
This command help you understand what the currently set attributes and values are on our system.
- Now issue the following command to change the path attribute from
the default of %systemdrive%inetpub\history to %systemdrive%MyWebHistory
–
Appcmd set config -section:configHistory –path:"%systemdrive%MyWebHistory"
- To validate the change, type the following and verify that maxHistories and period are set appropriately.
maxHistories="15" period="00:00:10" path="%systemdrive%\MyWebHistory" />
You see the following:
 Figure 16: Using AppCmd to list Configuration
Last, we will produce changes to the configuration causing a backup
to be triggered -- notice the new location for the directories and
files.
Step 4: Re-run the Earlier Script
- Execute ConfigHst.vbs by typing the following:
cscript //nologo configHst.vbs
If you check %systemdrive%\MyWebHistory, you see several directories
with folder names similar to CFGHISTORY_0000001, 2, and so on.
Summary
It is standard practice to move important, volatile data off the
server system partition (%systemdrive% by default) to other partitions
or drives. In this task, you successfully changed the target location
for the IIS configuration history directories.
Task 5: Restoring Configuration from a Backup File
It is not useful to have a history feature without offering a method
for restoring a previously working configuration. The purpose of this
task is to walk you through a manual process for restoring from a copy
of your configuration created earlier.
Step 1: List the available backups
- Click Start, Run, and type CMD and Click OK.
- Change to the inetsrv directory using the following command: cd %windir%\system32\inetsrv.
- To get the currently configured path for the configHistory section, type the following:
appcmd list backups
This command will list the available backups, including manual backups
made with the appcmd add backup command, as well as backups made by the
configuration history service.
You can use the appcmd restore backup command to restore any one of
these, as shown in the next step
Step 2: Restore the backup
Having followed the instructions in the step above to list the
backups, select the backup you'd like to restore and restore it by
typing the following:
appcmd restore backup
BACKUPNAME
Where
BACKUPNAME is one of the backups listed in step 1, for example, CFGHISTORY_0000000016.
You can also manually search the configuration files in the backup folder to determine which backup you'd like to restore:
Click
Start,
Run, and type
CMD and Click
OK.
- Change to the history directory using information in Step 1, above.
- Use Windows findstr command to locate the change you are looking
for. In this case, locate the configuration with directoryBrowse set to
false.
Findstr /S /I /C:"directoryBrowse enabled=\"false\"" *.config
This searches the current directory and all sub-directories for the
string directoryBrowse is equal to false. This returns only one item,
for example CFGHISTORY_0000000016, that indicates what we will restore.
Summary
In this task, we located a history copy and restored it. This task is
the most important illustration of the configuration history feature,
as it offers the ability to roll-back to a previously working
configuration with ease.